Showing posts with label Look What I Made. Show all posts

Thursday, January 2, 2014

Look What I Made! New Year, New Bags!

 
Goodness knows, I am NOT one for keeping "New Years Resolutions"...especially the sewing kind.
I'm not called: "HYPERNOODLE" for nothin'!  My overactive mind makes me horrible at sticking to pledges to "make this" or "sew that" in any constricting kind of time frame.
One thing I do know is that over the last few years, I have really, deeply, truly missed making things (especially purses/wallets and plushies)....and making things makes me HAPPY.  Being a creative person is very fulfilling when you are putting the pieces of a project together.  I don't know about you, but it gives me a "rush" that is just not comparable to many things!
My creative spark has been missing...mainly because with my second love (The Fabric Shop) I don't have time to be creative much less sew.  I've got several things I've sewn over the last year sporadically here and there that I've never even listed in my handmade Etsy shop!  I'll be getting them in there this week though!
So resolutions aside, I thought to myself..."Self, I'm not going to make a sewing resolution this year, but doing things that make me HAPPY needs to come to the front of the line", simply because I like the way making things makes me feel.
With that in mind, a couple of weeks ago, I sat down and sketched out some bag designs.  Did the math (my least favorite part--UGH!), then whipped up some new bags for the New Year!  Take a look!
Although I'd really like to keep both, the one on the left was a Christmas present for my sister.  We are both "Brit-fanatics" and I knew she'd love this Union Jack purse! 
Me, anything mod & geometric gets me goin' so I decided to make the Pink Chevron purse on the right for myself.  Both of these fabrics are available in my fabric shop right now!


Then, once I got started, I couldn't stop!  I went into my personal fabric stash and pulled this French Bull print (Windham Fabrics) out and it SPOKE to me ("Make a purse with ME" it kept saying!  LOL) and I obliged...
I was on a roll....I started drawing more ideas for bags and then sketching some super cute plushies that have been floating around in my "hypernoodle' for months!  
I looked back at these plushies I made several years ago because they always make me smile!  I sold them both and wish I would have made a second one of each!
Have you ever made something then looked back at it (many years) later and thought "OMG, I could make these SOOOOOO much better now!!!"...well, that was me looking at these plushie pics!

Purses made and sketches for new plushies drawn...my creative spark is restored.
Then....I had an epiphany....a real "A-HA" moment, if you will....what was it you ask?  Details coming verrrrrry soon!
But for now, I wanted to share these with you in hopes that your creative spark will be jump-started for your 2014 projects!
Happy Sewing! :)

Tuesday, February 12, 2013

Look what I made Volume 8

 
Next chapter of my "Try a new Fabric Vow" is going quite well...
If you're not familiar, I've made a vow to try a new fabric for projects. I was getting "stuck" using the same old, same old fabrics time and time again and with all the available new GORGEOUS fabrics, why keep using the same ones?
So my brother-in-law and wife have a brand new baby girl~yay! I set out to make them a gift set...and instead of going to my staple old favorites, I used several new fabrics I've never used before. 
(please excuse the pic quality in advance--I realized before we were walking out the door the other night to take the gifts to their house that I hadn't taken pics of them so I ended up taking these photos at night with cruddy light...side note to everyone...taking pics at night in cruddy light for posting online=NOT a good idea.  I tried to edit them as best I could, but I am a sewer and not much of a photographer...que cera...)

 First, here is the mini set I made:
mini-baby blanket, contoured burp cloths and a cute lil bib with a ribbon neckband
I made these with Camelot Fabrics Hot Chocolate line....LOVE♥  
These fabrics are so cute and versatile~ 
I loved using them! They made such a cute little set!  I used a super soft rose fur minky on the back of the blanket, dotted minky on the back of the burp cloth and costume velour--that I had hiding in my stash--in the perfect colors--which I found out is also super duper soft on the back of the burp cloths

Again, sorry for the cruddy lighting...ugh...I will never do this again!!!  LOL
Note to self: Never take pics at night with cruddy light!

Next, I made a pillowcase dress and matching diaper cover pants:
Ok, yes...I am really enjoying making the Pillowcase dress...it is just the BEST, cutest, easiest little dress that looks amazing on anyone!  I even made myself some pillowcase tops (semi-disaster with creating my own pattern and sizing issues--more on this coming in another post soon) ☺
For this dress I also used tried a new fabric--another print from Camelot Fabrics called "Sweet Peas in Pink"...
It made the most adorable canvas for this outfit, I just love the way they turned out!
Camelot Fabrics has some amazing prints-they have seriously stepped up their game and I am loving the new stuff they are coming out with.  All of these prints are available on our website if you'd like to add them to your "Try a New Fabric" regimen!

I am loving trying new fabrics instead of the same old same olds...it is so much fun and using a new fabric brings an element of surprise to the finished product.  It really gets those creative juices flowing and motivates me to make more things and actually FINISH my never ending stack of unfinished projects!

Have you tried a new fabric yet?  If so, what have you made?
I'd love to hear!
Happy Sewing, Ya'll! ☺

Tuesday, December 18, 2012

Look What I Made Volume 7

  
The Holiday Season is upon us and every year I vow to make gifts in lieu of buying them...
And every year, I fail...miserably, I might add, to do so.
One of my closest friends had a daughter 3 years ago and I was so excited to start making things for her.  Well, being the terrible friend that I am, I haven't made A THING (smh!) and it's been 3 YEARS!! Ugh!

I finally decided this year that ENOUGH was ENOUGH and got on the ball.
When choosing fabrics for a project, I know lots of us like to stick with prints that are "safe favorites" to us.  Those familiar prints we use again and again.  I have taken the "USE A NEW FABRIC" vow to change it all up.  
I've touched on this before--some fabrics from manufacturers are only printed for 1 run.  Others are printed for several runs and then discontinued.  These are the fabrics that always "get us"...the ones that seem like they are going to be around forever and then one day are discontinued and just disappear.
I cannot tell you how many panic stricken emails and messages I have gotten from people desperate to find a discontinued fabric.  It is really imperative in the fabric world that we don't get "stuck" on a print--especially if you are using it for a product that you make for your business because in the blink of an eye, that fabric can be out of print, discontinued, retired...adios, farewell, Auf Wiedersehen!  I've seen it happen over and over again!  

Truth be told...it happened to ME too.  I have 1st hand experience of a favorite fabric of mine that I used to make purses for my own Handmade shop fading away into the distant darkness never to be heard from again.  It is a jolt when it happens--because it is so unexpected...you think that print is going to be around whenever you need to order more and then suddenly...you can't find it anywhere because it is not being printed any longer.
Variety is the spice of life!  Staying up on the newest fabrics and changing the prints you use will not only add more choices, but will bring you new customers who prefer "fresh" fabrics rather than the same old same old.

By all means if you have a fabric you use to make items and it sells and continues to sell made with that fabric, keep using it!  But please, I implore you to add new fabrics to your line up every season so that you are not in a bind if one day your favorite is discontinued!

In line with this and my "USE A NEW FABRIC" vow, when I sat down to make gifts, I used only fabrics I've never used before--to keep it fresh, new and fun.  I've decided to use a new fabric on a minimum of 80% of the projects I make in 2013!
I mulled over it for awhile because not being "familiar" with a print makes you unsure of how it will look in your final project.  When we use a print we've used 1,000 times, we know what to expect and can pretty much know exactly what it will produce and/or look like.  But I realized that part of the fun in creating IS the surprise of using a new fabric and the sheer delight of how DARN CUTE it is when you're finished!!!  Here's a peek at one of the dresses I made for my friend's daughter:
I used 2 fabrics from Joel Dewberry's new "Notting Hill" line:  Primrose in Magenta and Tartan in Tangerine....prints I was not exactly sure about what the final outcome would be--but I tried them anyway because the colors really caught my eye.  And in the end it was BETTER than I imagined!
I LOVED this dress when it was done! Soooooo cute!  Who would have known?
 I also made this outfit:
I used L'Amour de La Vie Eiffel Tower in Red from Timeless Treasures Fabrics for the main print and Dumb Dots in Black from Michael Miller for the trim!

I was so pleased with these fabrics when I was done!
Try a new fabric for your next project~broaden your fabric horizon and embark into the creative unknown...if you are a "Hypernoodle", it is a newness you will absolutely adore!

Happy Sewing! ☺


Tuesday, November 20, 2012

Simple way to get all Pattern Sizes out of a purchased pattern

Howdy ya'll! ☺
I've had quite a few people ask me questions about numerous different sewing related subjects.  
I seriously need to get on the ball and start doing tutorials for these things (like I said I would many moons ago!)  Life always throws me a curve ball right when I get to it though!  I'm sure there are tons of you that know that being a wife, mother and business woman does not afford you much free time!
But, today...today is a different story!  I have set aside time before the dinner-making must begin for a quick and simple tutorial on getting all the Pattern sizes out of a purchased pattern!  This may not be any new information to Advanced Sewers, but I've had a bunch of newbies ask me this!

I don't tend to use patterns much, I like to design things and draft my own.  But I wanted to make slippers for some family members for Christmas and didn't have the time or brain cells to design one and then draft patterns for all the various sizes of everyone's feet.  So I purchased this pattern:
Kwik Sew "Snuggly Slippers"!  Super cute!
As you all know, when you open up a store bought pattern, this is what you get:
Ack!  Right?  I've actually had people who want to learn to sew tell me they are intimidated by patterns because they appear so confusing...   :(
If you look at the directions included with the pattern pieces, it will tell you which pieces you need to use for the item you'd like to make.  I am making "VIEW B" which is the photo on the top with the fuzzy green lining.  The directions will tell you which numbered pieces to use to create your project.  You only have to cut those out, not any of the other pieces.  
Now, when you look at the pattern, for the piece numbered "1", there are multiple sizes and they are all layered on top of each other.  If you wear a "SMALL" and you want to make those but your sister wears a "LARGE" and you also want to make those--how do you do that without sacrificing the other sizes?  If you cut out the "SMALL" pattern piece, the medium, large and extra large and pretty much destroyed.  And if you don't cut them out how will you transfer the pattern piece to the fabric???
Never fear!  We're going to make new pattern pieces and salvage the entire pattern!
You could get some pattern tracing paper and a wheel to transfer the pattern to the fabric, but most sewers don't like to do this...at least the ones I know!
You only need 2 things...first thing you will need is some wax paper:
you can find wax paper at your Grocery Store~very cheap too!
•Pull a piece of wax paper off your roll big enough to fit over the pattern piece you need
•Choose the size you'd like to make and using a Sharpie, trace around that size on the wax paper like so...
You can trace on the wax or non-wax side...I like to use wax paper because not only is it transparent enough that you can see right through it easily without having to use a light table, but the consistency of it is very similar to the actual pattern pieces (minus the wax of course!)  When you've traced the size you need,  remove the wax paper from the top of the pattern and you will have this:
Now you can simply cut around your wax paper and...Voila!  You have the size you need!  Make sure to transfer any information on the original pattern piece to your new wax pattern piece...most importantly the size!  Like so...
Here I'm doing the same tracing with the sole of the slipper
Repeat this tracing for all of the pattern pieces you need to complete your project.  Here are all my pieces traced and marked for a size "MEDIUM" slipper
Now I've got all new pattern pieces and my original pattern is still in tact so when I need to make a LARGE or a SMALL I can create new wax pattern pieces without cutting my original pattern.
If your original pattern piece is too big for the width of the wax paper you have, simply tape your wax paper together to form a piece big enough.
Like I mentioned, you could also use tracing paper and a tracing wheel to trace the pattern onto your fabric, but this can compromise the original pattern and cause it to rip or be filled with holes.  That's why I use the wax paper so my original pattern is never compromised.
As a side note, you could also use Freezer Paper instead of wax paper...the shiny side of FREEZER paper (not wax paper) can be ironed onto cottons and then you can cut right around it.  FREEZER paper is thicker than wax paper though and not transparent, so you will need a light table (or a window with good light coming through it as a 'light table') to cut out your new pattern pieces.  If you use FREEZER paper, make sure you trace on the NON shiny side.
After all that...here are one of the pairs of slippers I made:
The 1st ones I made were with cotton, but the were very "floppy" and not sturdy like good winter slippers should be.  So as I usually do, I switched it up--I used fleece and added an extra layer of batting in between the lining and the outer shell...it made them "meaty"!  Soft and plush with lots of warmth...
dontcha just love 'em?

Tuesday, October 18, 2011

Look What I Made! Volume 6

Goodness!!  I have been a busy, busy bee! ~
Check out some of the stuff I've finished:


The cupcake Ipad case didn't last long in my Etsy Handmade shop~ someone swooped in up shortly after I listed it!  It was made on a whim because my "Hypernoodle" got the idea that one of my Ipad cases with a cupckae on it would be cute....and it is soooooo cute~I'm definitely going to make some more!

The top picture is a Halloween Wall Sign~I pieced together 2 fabrics, cut out the letters and stitched them on soft n' fuzzy fleece, then stitched it too the sign.  I also used ribbon to hand-make a custom bow for it and I love the results!  I originally made this sign to go in my house~ LOL--but I had to make another one for my Handmade shop, it is just adorable!  Then, I ended up making one for Thanksgiving and Christmas too!  You can check them out in my Etsy Handmade shop (click the link on the right side bar for quick access!)

And the 2nd picture is of my newest purse design.  I am really extra, super proud of this design-I think it is one of the best purses I've ever made!  I made a few all in different colors...you can check them out also in my Etsy Handmade shop!

With the Holidays quickly approaching, I have lots of other stuff in the works~whether or not I'll get them all finished is another story!  There will be another Give-Away within your reach and I'm working on a tutorial for the blog here...it's coming along~but there is a lot of work in a tutorial to make sure you are covering all the bases! 
Quilt Market is also coming in a week and 1/2 (post on this coming soon!)  and I have a gazillion things I need to do before Quilt Market....ARRRGGHHHH!  LOL!  ***Breathe*** lol... in all reality, I'm used to this by now~and I love it all--It's all in the Life and Times of your favorite Hypernoodle! ☺


Thursday, September 15, 2011

Look What I Made! Volume 5

Here's your sneak peek at a couple of the things I've been sewing like an animal the last few weeks!

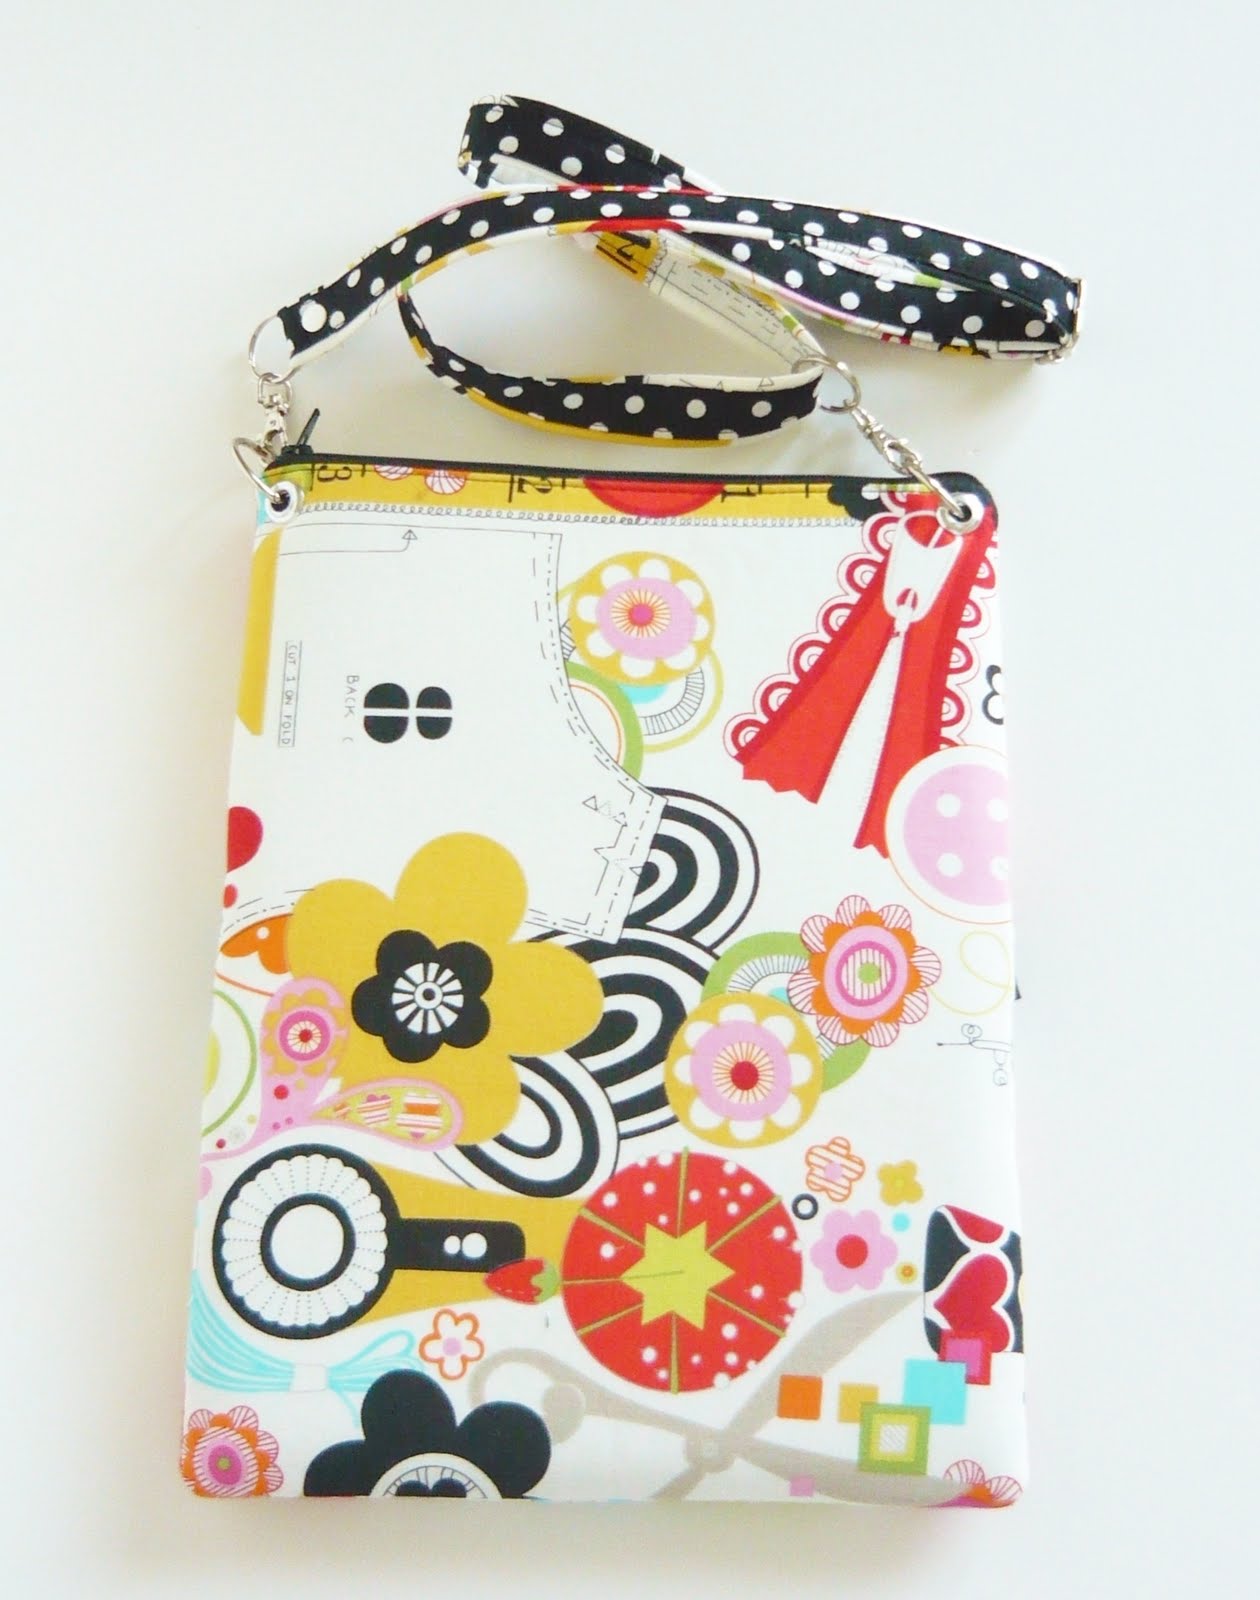
BACKSTORY:  I got a snazzy new Ipad2 a couple of months back.  I take it with me to my son's weekly Speech Therapy appointments & had been carrying it in my arm/hand....I DROPPED it--(Ugh!) and thank goodness it wasn't damaged--ummmm yeah--lesson LEARNED!  I needed a padded case not only for protection if I dropped it, but I wanted to tote it hands free (so there was less of a chance of me dropping it!) and I wanted a strap.  I also needed a pocket to put my stylus and charger in...drum roll please....
TA-DAAAAAHHHH, Here she is!
I LOVE it, it is *PERFECT*!  I choose this cute Alexander Henry sewing print to make it in because it reflects me wonderfully!  It's got a zippered closure so it'll stay snug inside and an adjustable strap so I can make it a cross body bag if I want to instead of a shoulder strap~Yippee!!
The pocket on the front has a cute ruffled trim on it~very girly--cause I'm a true Girly Girl--but it also adds a nice design element, dontcha think?  I hand gathered the ruffle...I don't have a gathering foot on my sewing machine and when I try to use the technique with the basting stitches to ruffle, I don't like the results.
It is so super cute and functional, I can't stand it!  I've gotten sooooooooo many compliments on it at the Speech Therapy Office and requests to make some as well!  Here's a pic of the back:
I like Hardware.  I think it really makes a bag of any kind.  So I put on nickel swivel clasps, hoops and grommets.  It just adds an extra lil' somethin-somethin' to the overall look. 
It is soooo nice to put my Ipad2 in this padded sleeve and throw it on my shoulder so I can walk hands free.  The best part about it is sometimes I use it as a crossbody sling when I'm running to the store/Post Office or Gas Station...instead of putting my Ipad2 in it, I throw in my wallet, keys and phone when I'm making quick trips--it's an excellent "grab n go" carry all.

NEXT BACKSTORY:  I have a stack of bills and misc mailers on my desk.  Along with my International Shipping Customs Sleeves (for all you International customers, that is the plastic sleeve your shipping documents/customs forms are in when you get your package!)  I needed something to put them in so it didn't look like a jumbled mess.  Yes, I could have gone to Office Depot or Staples and bought a metal or paper organizer or bin...but I am a *FABRIC* Girl!!  So naturally, I made a Basket out of fabric!  Here it is with all my stuff inside:

Notice a common theme here?  LOL--Yep, the ruffle trim...I have become somewhat addicted to it here lately--it's just so darn cute!!!!  So I am able to keep all the stuff that was messing up my desk nice and neat inside this cute cupcake basket!
NOW--after I made this, I wanted to pick it up and move it and said to myself..."Self, you should have put handles on this basket"....soooo guess what?????

Yep, I made one with handles...Notice the handles are attached with Nickel Stud Rivets (Hardware again, folks--I love it!)  This one in particular is going into my Handmade Shop on Etsy this weekend with a few other ones I made.  I've got some Fabric Baskets with handles, several Ipad2 Sleeves with adjustable straps and a BRAND NEW PURSE DESIGN all going into my Etsy Handmade shop this weekend!  The new purse design is truly a labor of love that I am UBER excited about! 
Stop by my Handmade shop this weekend to see the new purse design!
I'll probably still post a pic of it here on the blog for ya next week as well~soooo excited!
I may start making tutorials here on the blog for some of the quick n' easy projects that I do--who's interested????
Happy Sewing! ☺
Michelle

Tuesday, August 16, 2011

Look What I Made! Volume 4

I reaaaaally love pillows~ I think they are the easiest way to spruce up a room and/or give it a new look if you don't want to paint or re-paint the walls.
I pulled some colors out of the area rug in our living room and decided to make some new pillows for the couch and love seat...and here they are!
Nifty, huh? ☺
I usually like prints on pillows~but these colors are so bold and pretty, I thought they would do best standing on their own.  I still had to have a print though, so I *did* make some larger pillows using a stripe print that matches all the colors.  You can see a glimpse of it on the back of the color block patchwork pillow at the bottom of the picture!
I cannot take credit for this particular pillow design though~ A guy (yes, a GUY) at one of my fabric distributors was the inspiration with a pillow design he created for an in-store display.  I loved the tufted button on the pillow, so he and I picked out the fabric for mine!  Since he whipped them up for an in-store display and didn't have a pattern, I just went home and sized them like I wanted them and guesstimated how I could make the envelope flap...it took 3 tries to get it right!  LOL--I mixed mine up a bit adding some Color Block pillows and making the tufted button a different color than the main solid color on each pillow.
They were a hit!  Everyone loves what I did with mine an how I put a new twist on it!
They just provide a *Pop* of color to the living room and everyone who comes over has been raving about how fabulous they look!  My Mother-in-Law liked them so much that she asked me to make some for her!  I whipped up 2 big ones for her in outdoor fabric for her patio chairs!  They are Maroon and Camel colored and they look soooo good in those colors!  I should have taken a pic of them before she snatched 'em!

I've got tons of project ideas in the works~including some new items for the Hypernoodle Handmade shop.  I'm hoping to be able to get them done in the next few weeks~ Yay! 
Happy Sewing, Ya'll! ☺

Friday, July 22, 2011

Look What I Made! Volume 2....

Ok...so I never finished the other pair of lounge shorts I was telling you about (no surprise!)  I seriously have Craft induced spazi-ness, I can't keep my mind on a project long enough to follow through because then I get another idea in my head that sidetracks me! (this is where the name "Hypernoodle" came from, in case you didn't know!)  When it comes to projects and ideas, I am *definitely* all over the place.  One minute I'm like "ooooooo, yeah! I'm going to make such-and-such!"......
10 minutes later, I'm like: "What was that I was saying I was going to make?....oh well...ooooooooo, I can make this doo-dad!"  Well, this happened about 40,000 times before I started carrying around a little notebook I call my "Hyper Pad" so that I could at least write down these ideas as they are coming at me. (It helps!)

Besides not being able to sew with the launch of hypernoodlefabrics.com, here is what also side-tracked me from the lounge shorts........a cute lil' night gown/pajama dress:
 nothing fancy--super easy!  This is my "Knit Escapade, Part Deux"--hee hee hee--I made the spaghetti straps out of ribbon!  As usual, no pattern...I already had measured myself for the lounge shorts, so I guesstimated the length I wanted it & cut out a simple silhouette with a scoop neck...it fits perfect!
And yes.....the mannequin has on a turtleneck...LOL...I didn't feel like undressing her to take the pic-LOL!
There's nothing like sewing, is there? *Sigh* it's soooo rewarding!
I just KNOW you guys can identify! ;)

There's another Give-Away coming next week, ya'll~so stay tuned!


Monday, June 6, 2011

Look What I Made! Volume 1...

My Hypernoodle is in full overdrive...and while I ♥love♥ making purses, my creative juices have been craving to make something other than a purse!  I don't have a lot of sewing time lately with the Fabric Shop and building the Website for that, but in the **wee** hours of the morning when normal people are sleeping, I have been making lists of things I'd like to make and trying to whip some of them up!  The list is growing out of control but as I get them made, I'm going to post them for you all to see in my "Look What I Made!" blog section  Here's my first adventure....Lounge Shorts...
They have a drawstring and elastic waist~ I was so proud of myself because I typically don't make clothes~I wanted to make them with a knit fabric cause it is sooooo comfy~ and I found a cool fuchsia colored one in the clearance bin at my local fabric shop.  Mind you, it has been quite sometime since I sewed with knit fabric...the 1st time I tried years ago, I didn't have the right tension on my machine and I also didn't use a Ball Point Needle...so needless to say, it was a *HOT* jumbled mess and it scared me away from knits!  But I decided to try again because knowledge is power and now that I know lots more about knits--and used the right notions--it was a BREEZE!  Easy as pie!  Yaaay! 

I didn't use a pattern, I have a favorite pair of Lounge Shorts that seriously need to be retired so I laid those out to make a template for sizing purposes.
I was trying to "eyeball" it to make the template and I added waaaaaay to much for seam allowance because they are HUGE!  LOL!  I mean GIGANTIC on me!  I put them on and my husband just started hysterically laughing--but I had to laugh too because they look ridiculous they are so big!  (please laugh with me if you have ever had such a sewing mishap!)  Anyway, I'm not perfect and I love laughing at myself~so I wanted to share it with ya!  My aunt who taught me how to sew always used to tell me that you can learn a lot more from your mistakes than you ever thought--and she is SO right! 
The good news is that I actually measured myself and I know if I shave a bunch off my template, that they will work perfectly!  I guess this is why they say "measure twice/cut once", eh?

Anyway, now that I have conquered my fear of knits, I can make plenty more cool Lounge Shorts!  I have some Hello Kitty knit fabric and I'm going to have another go at it!  If they turn out as well as I hope~ I'm pretty sure I am going to have a kazillion pairs of Lounge Shorts to choose from! 
What do you guys think of Knit Fabric?  Do you use it?  Would you like to see some in the shop?  Let me know! ☺
© The Hyper Hub. Powered by