All the fantastic designs and colors really speak to my creative mind.
It's so much fun and so easy to use, that I have "Mod-Podged" it onto a variety of paper items to add some design and color.
Then, my "Hypernoodle" got to thinking how cool it would be to have a fabric version of these wonderful little tapes! If you're familiar with washi tape, you know that the feel of it is not very "tape-like" (in the traditional tape kind of way) As I was unrolling it, I noticed that to me, it is kind of, sort of "fabric-y".
Awhile back, I discovered a crafting medium from Martha Stewart called "Fabric to Fabric Durable Oilcloth Finish". This genius medium is much like Mod Podge, but is specially formulated to create an Oilcloth finish when applied to fabric. So I made some Washi-Tape fabric and you can too with this easy tutorial!
Items needed:
-Martha Stewart Fabric-to-Fabric Durable Oilcloth Finish Medium
(A number of places online sell this, but I found it at Michaels Craft Store)
-Your Washi Tape selections in the desired patterns
-Cotton background fabric (I used solid white, it provides a nice clean background)
-Craft Squeegee. Martha Stewart offers a nice one (also purchased from Michaels)
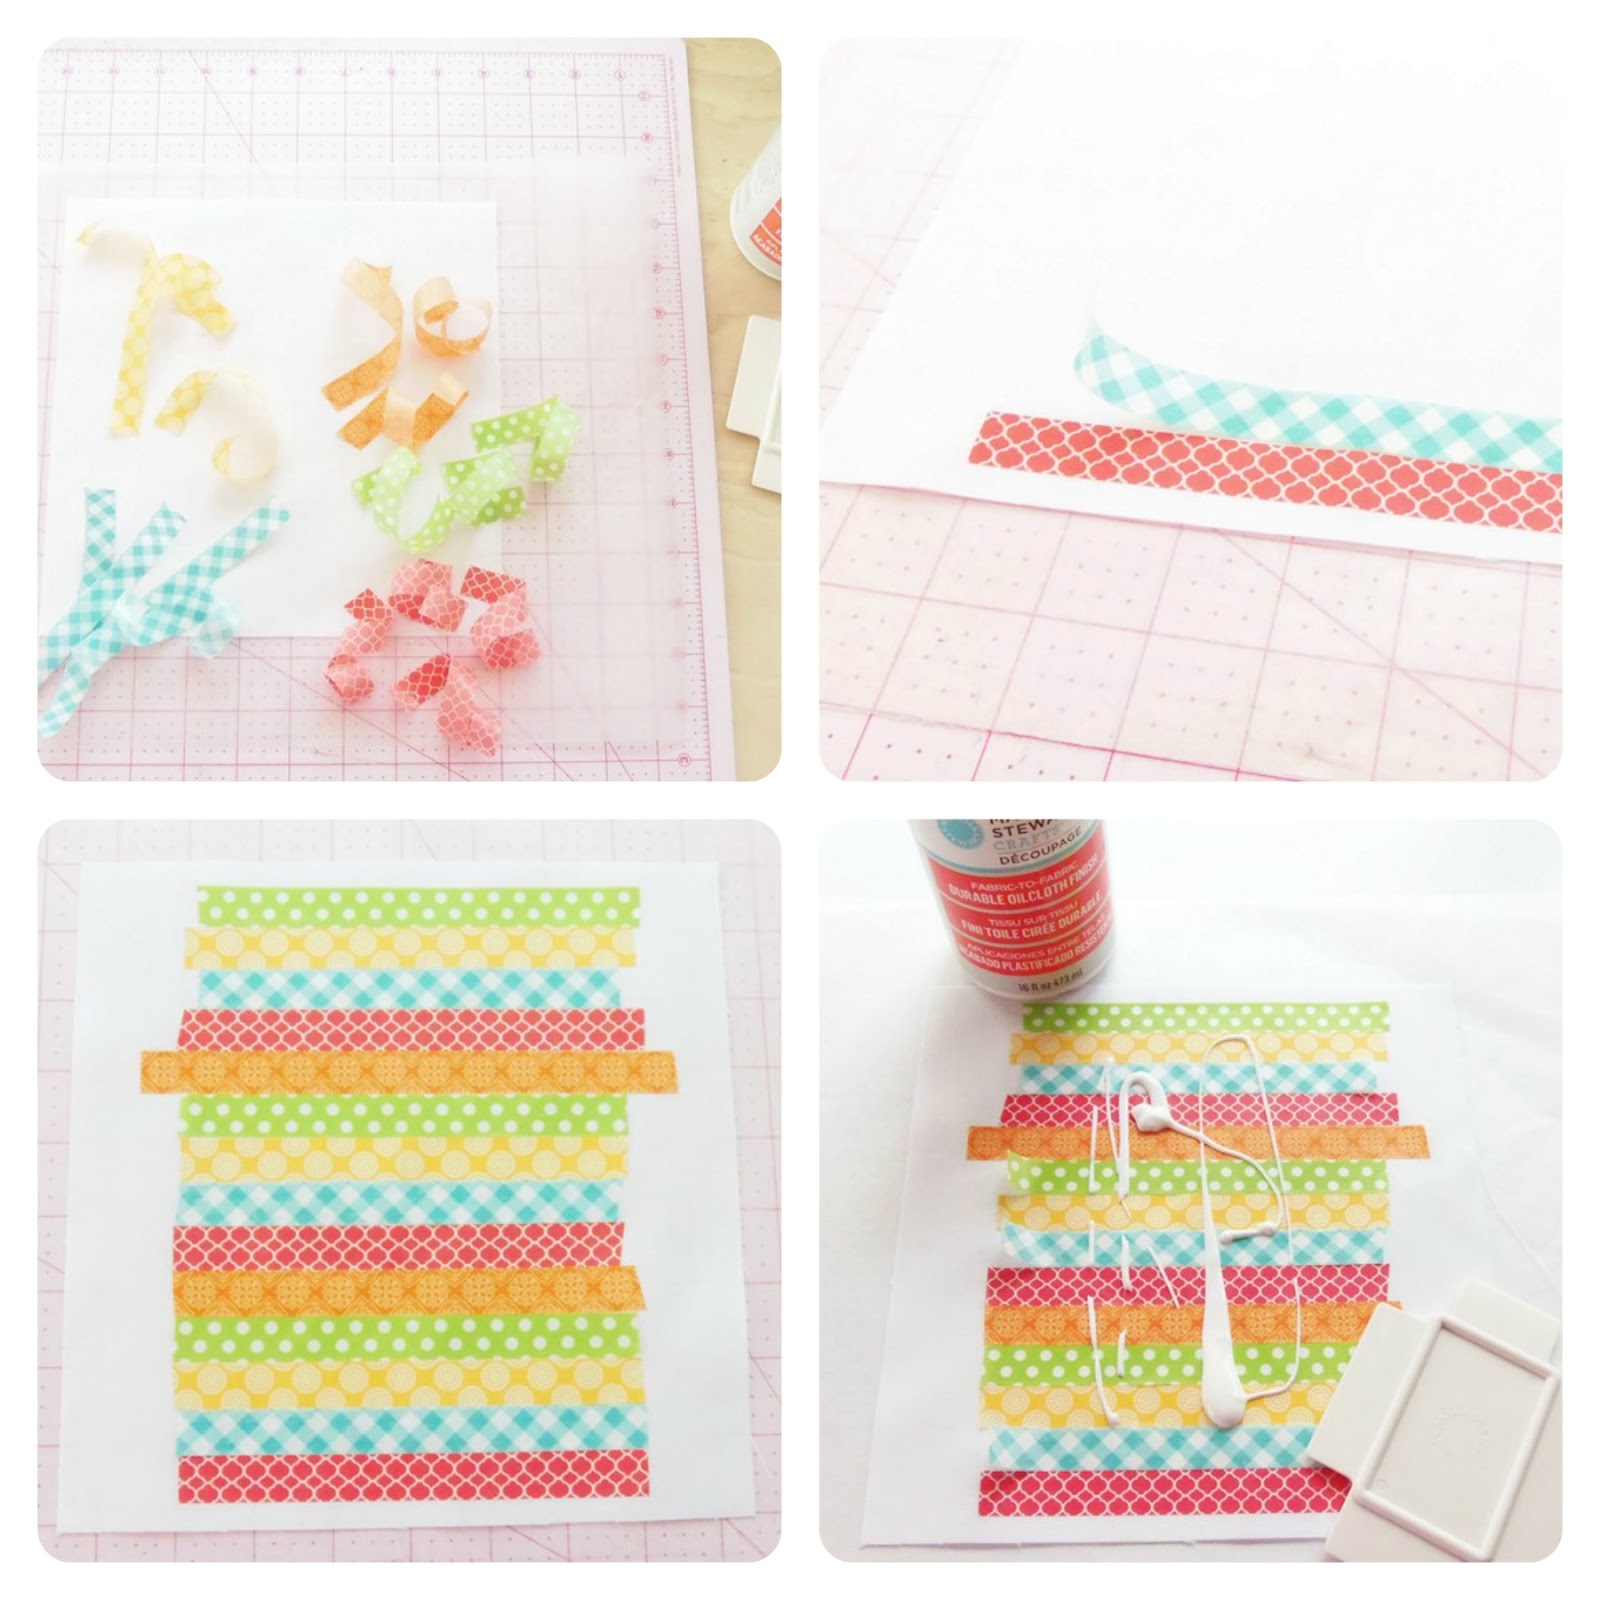
•Cut your cotton background fabric to your desired size. Make sure you leave a little extra on the top, bottom and sides from the length and height of your washi tape pattern for the medium to run over. I cut mine fabric to a 9x8" rectangle. Cut your washi strips in your desired length. I cut mine about 6.5" inches long.
•Apply your washi tape strips to your cotton fabric. I did mine in nice even length-wide rows lining up each tape strip butted up even and close to the one below. You can lay your rows from top to bottom or even in a criss-cross pattern! Here's where your creativity can come through!
•When you're done applying the washi tape strips to your cotton fabric in your design, press them down again using the side of your thumb making sure all the tapes are adhered to your cotton fabric.
•Apply the Oilcloth medium right away~
(Don't do what I did and wait until the next day! Some of your washi tape strips may loose some of their "stickiness" and won't stay adhered to your cotton fabric! See the pic!) You may find that some brands of washi-tape may not adhere to your cotton as well as others anyway, even if you don't wait until the next day. This is ok, you'll catch it when using the squeegee, but still try to apply the medium as soon as possible after you are done with your design.
•Using your squeegee, spread the medium over the fabric in nice even strokes following the manufacturer's instructions. Pay special attention to the areas where your washi tape meets. Don't worry about thin "squeegee" lines on top of your fabric from the medium, they blend in when the medium dries.
•The manufacturer's instructions say 2-3 coats total, but I found that 3-4 coats (letting each coat dry in-between for about 45 minutes) really helps the washi tape blend- into what looks like one piece.
•When you're done applying your coats, let dry completely. I left mine to dry overnight. You'll then come back to a nice & dry, shiny, sleek, oilcloth finish!
•Almost done! Cut your excess cotton background fabric off~ If your outer edges will be exposed, make sure to treat them either with a thin coat of more of the Oilcloth Medium or with Fray check.
Now your Washi Tape fabric is ready to use!
I made this cute little pouch using my washi tape fabric!
If you'd like to make one of these pouches with yours, simply cut out a rectangle, fold the bottom up to your desired pocket size and topstitch. Then just fold the top flap down and apply a KAM snap! Cute and easy!
As with any oilcloth fabric, use a teflon foot on your sewing machine if you plan to sew it!
& please feel free to share any designs or projects you made with your washi tape fabric on my Facebook page! Hypernoodle Facebook
Have fun!
♥Hypernoodle


This is really cool!
ReplyDeleteThank you, Mara! I think so too! It is so much fun to see the design develop from the tapes! :)
Delete